Bad practice: not using a ButtonStyle
You’re more of a video kind of person? I’ve got you covered! Here’s a video with the same content than this article 🍿
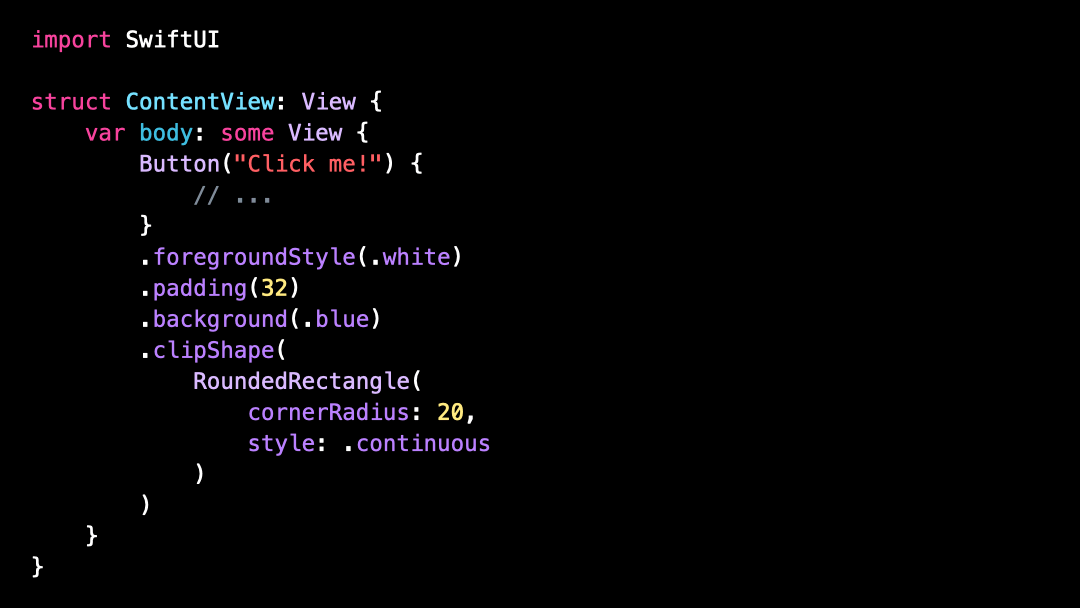
Can you guess what’s wrong with this code?

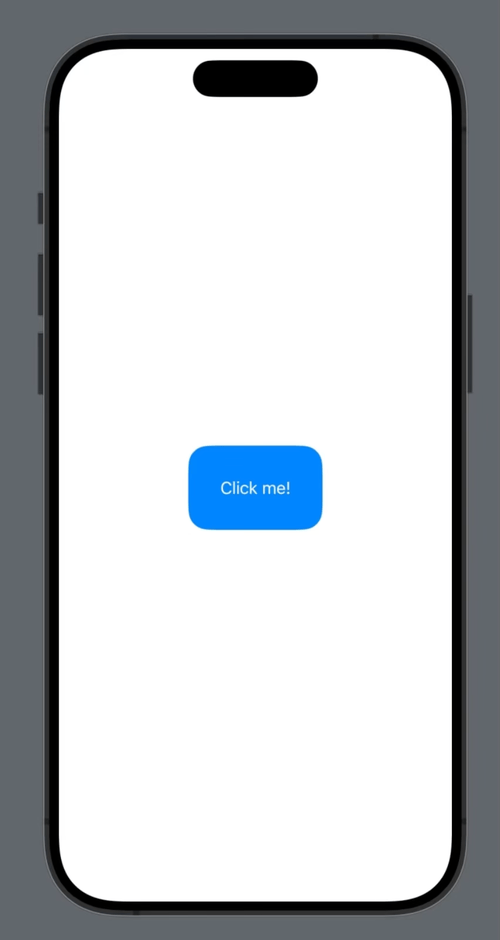
At first glance, everything seems to be fine: the Button we’ve implemented looks alright and we can successfully interact with it:
But if we take a closer look, it turns out that this Button actually has quite a big issue!
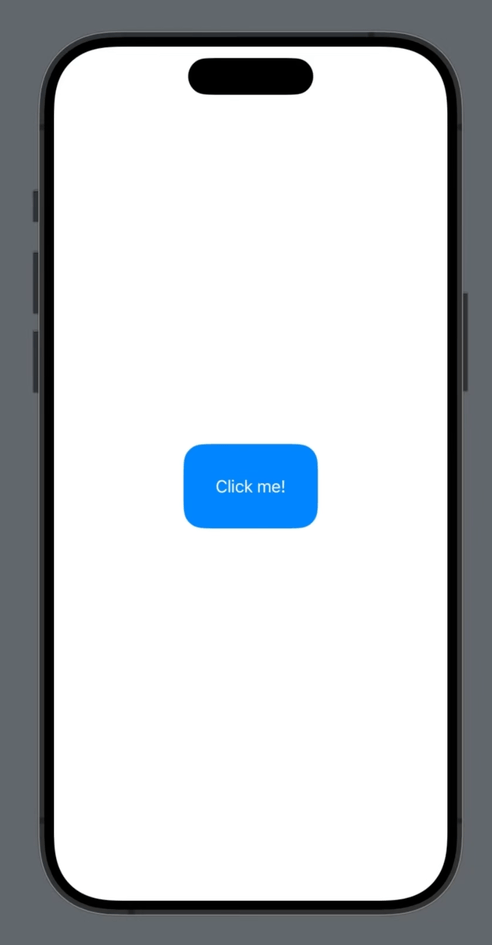
You see, if we try to tap the Button outside of the space occupied by the Text, nothing happens:

This behavior might be quite surprising, because when you look at the code every thing seems to be correct.
But this is definitely a problem that needs to be fixed, because this behavior of the Button will be very confusing for our users.
So let’s try to understand what’s happening.
This way of creating a Button by passing a String is actually equivalent to using this other initializer, where we explicitly pass the content of the Button through the argument label:
And the way a Button works is that only the views that are part of its label can be tapped to interact with the Button.
However, in our code we’ve applied the blue .padding() to the Button itself rather than to its label!
So that’s why when we tap on the blue .padding() nothing happens!
Fortunately, fixing this issue is very simple: we just need to move the code inside the label of the button…
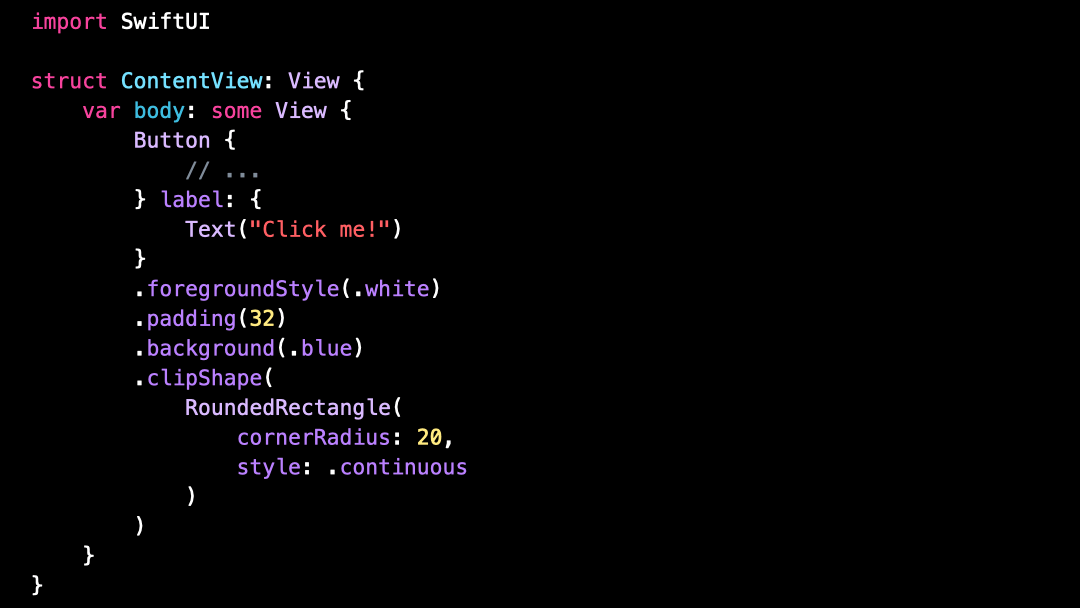
…and now the Button is working as you would expect: you can interact with it by tapping either on the Text or the blue .padding():
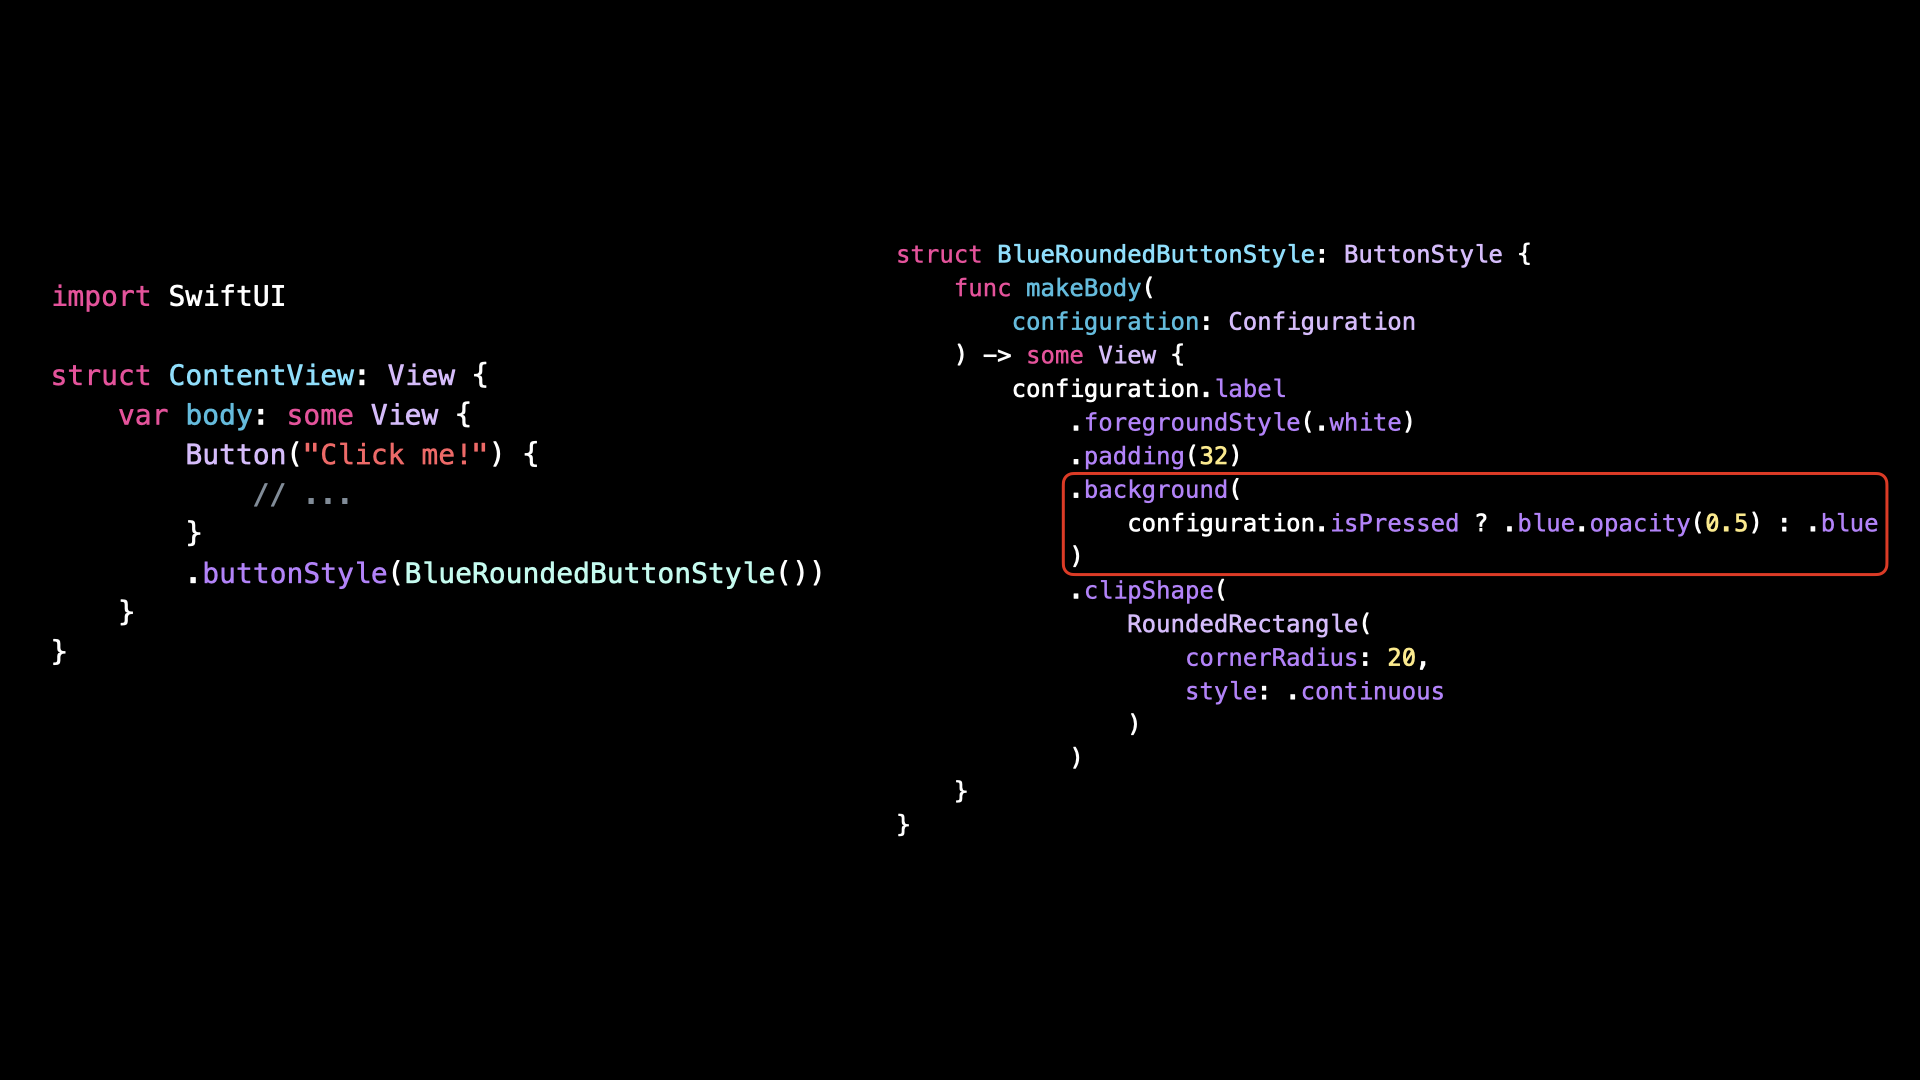
We can take things even one step further, by encapsulating the code into a custom ButtonStyle:

This way it will be easier to re-use the code in several places and it will also allow us to go back to using the previous initializer to create the Button:
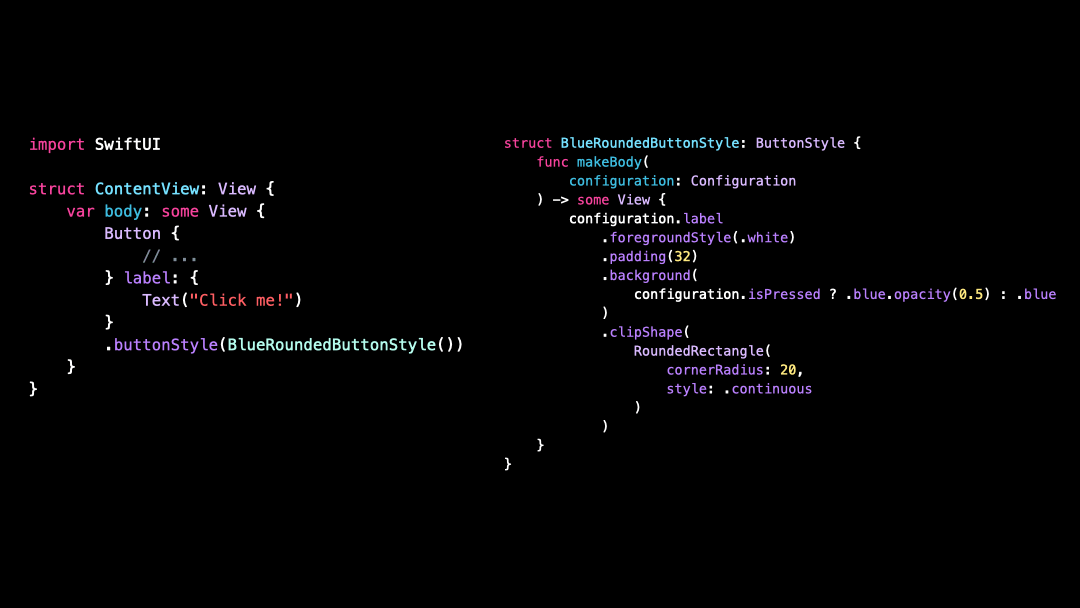
Just make sure to explicitly define how the Button should look like when it’s pressed, because you will no longer get that behavior for free!
That’s all for this article, I hope you’ve enjoyed learning about this mistake that’s very easy to make.
Here’s the code if you want to experiment with it:
// Before
import SwiftUI

struct ContentView: View {
    var body: some View {
        Button("Click me!") {
            // ...
        }
        .foregroundStyle(.white)
        .padding(32)
        .background(.blue)
        .clipShape(
            RoundedRectangle(
                cornerRadius: 20,
                style: .continuous
            )
        )
    }
}

// After
import SwiftUI

struct ContentView: View {
    var body: some View {
        Button("Click me!") {
            // ...
        }
        .buttonStyle(BlueRoundedButtonStyle())
    }
}

struct BlueRoundedButtonStyle: ButtonStyle {
    func makeBody(
        configuration: Configuration
    ) -> some View {
        configuration.label
            .foregroundStyle(.white)
            .padding(32)
            .background(
                configuration.isPressed ? .blue.opacity(0.5) : .blue
            )
            .clipShape(
                RoundedRectangle(
                    cornerRadius: 20,
                    style: .continuous
                )
            )
    }
}